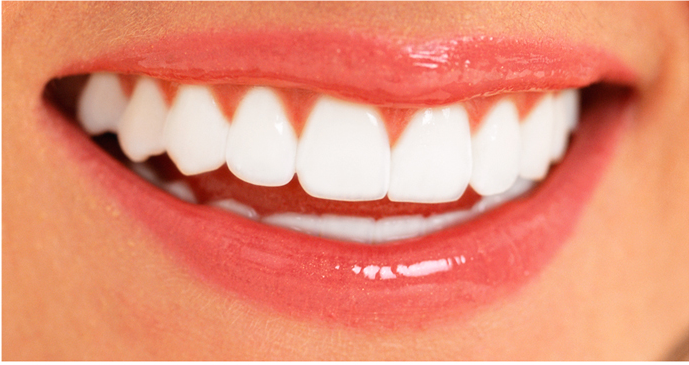
How many times have you been asked by a client to improve his/her facial aspects in a particular picture? I’m sure many a times. So, have you been competent in delivering the picture as desired by the client. In simple words, have you been able to improve the person’s skin tone, grow hair on his/her scalp, whiten up his/her yellow teeth, made him/her look taller etc.? If your answer to all these questions is a “No”, then you don’t need to fret anymore. I assure you after a complete reading of this blog, you’ll be able to improve the teeth color for pictures that come to you for improvements. Photoshop is equipped with enticing features that allow you to whiten up yellow teeth. By following the steps mentioned in this tutorial, I’m sure you’ll thoroughly be able to whiten yellow teeth in Photoshop, without spending colossal amount of time.
Firstly, here’s a look at what we intend to achieve via this tutorial:
Step 1- Make sure all the other corrections are being made prior to proceeding with the teeth whitening process. This is important because once the yellow teeth have been whitened; performing other changes might require a great deal of time and efforts. The original image looks like this:
As the web designer, you need to apply a variety of edits ranging from changing the contrast, color, levels, hue/saturation before proceeding to the final teeth whitening edits. Below, is a screen-shot of the edits you need to perform at your end.
The image attained thereafter carrying out the edits will look something like this:
Step 2- In Photoshop, duplicate the layer and choose your edit
Go to the ‘Layers’ section within Photoshop and create a duplicate by naming it something as “teeth whitening” or anything related. Once you’re done with duplicating and naming the layer, proceed with making edits to the teeth area within the image. For your reference, here’s a screen-shot for the layer duplication step:
Step 3- Use the Pen Tool
Although there’s an easy availability of several ways to whiten yellow teeth, the one which has been used and recommended by Photoshop users is the usage of Pen Tool. You can start using this tool by pressing ‘p’ on your keyboard or selecting the pen tool from the left hand tool bar. The basic purpose of using the Pen Tool is to create paths around the area that needs to be edited. Here, since we’re intending to whiten the teeth, so the area of focus will be the teeth. Below, are the screen-shots for 2 options available for Pen Tool selection:
Step 4- Applying the Paths Technique
Prior to proceeding with the Paths technique, make sure you’ve selected the ‘paths’ option provided towards the top left hand corner of your tool bar. Here’s a screen-shot of what you need to select from the tool bar:
Once you’ve selected the ‘Paths’ option, simply click to set the path points around the teeth. Here, you need to click and hold followed by moving the cursor up or down to adjust the curves available within the set of teeth. Make sure to outline all the teeth so that the whiteness appears evenly. Below is the screen-shot for how the path points need to be set.
Step 5- Making selection, followed by Feathering
Once you’re done with outlining the teeth, right click and ‘make a selection’. After this, customize the Feathering options i.e. adjust the Feather Radius to 1(recommended) as an attempt to smooth out the teeth edges. After this, simply copy paste the selection to perform other adjustments in terms of hue, tone etc. This is how the feathering process will look like:
Step 6- Giving the final touches
Once you’re back in the standard photo editing mode, opt for adjusting the hues and tone of the teeth. Here, you should set the hue-saturation level to yellow, the value for both hue and saturation to around 80 and make suitable adjustments to the main image. You may opt for the dodge tool to set the hue/saturation range to midtones and exposure percentage to around 15%. As the final step, you can use a large brush that will cover your selection and convert the yellow teeth into sparkling white ones. Below is a screen-shot for the customization panel you need to use here:
Here’s a look at the image you’ll get once you’re done with all the aforementioned 6 steps:
Wrapping Up
Hope you’d have found the above tutorial steps easy to follow. I’m looking forward to receive your views/opinions on the above tutorial. Your feedback will definitely turn to be useful both for me and for my readers.
Author Bio: s.k.satheeshkumar is a web developer by profession and a writer by hobby and works He loves sharing information regarding Psd files


No comments:
Post a Comment